Showing posts with label M31. Show all posts

Wednesday, October 26, 2022

Two more finished images

These images continue my reintroduction to imaging. Big bright targets both, they're helping me prepare for the challenges ahead.

First is this completion of an earlier luminance-only image of M31:

The technical data and full scale image are here.

The colors in this may seem muted to you, but that's intentional. I much prefer less saturated images than  the common practice that I refer to as "color clipping" which results in super-saturation. See my other images from this year for other examples of softer hues, particularly the Cave and Gamma Cas nebula.

I am continually amazed by what the combination of autofocus and premium optics can achieve. Here is a full-scale portion of M31:

Hubble's Cepheid in M31

That unimpressive yellowish, fuzzy glow is a single star in another galaxy, in this case a rather historic star: Hubble's Cepheid Variable Star V1. Maybe I shouldn't be so excited about this, but I can't imagine resolving this with my old gear and manual focus. 

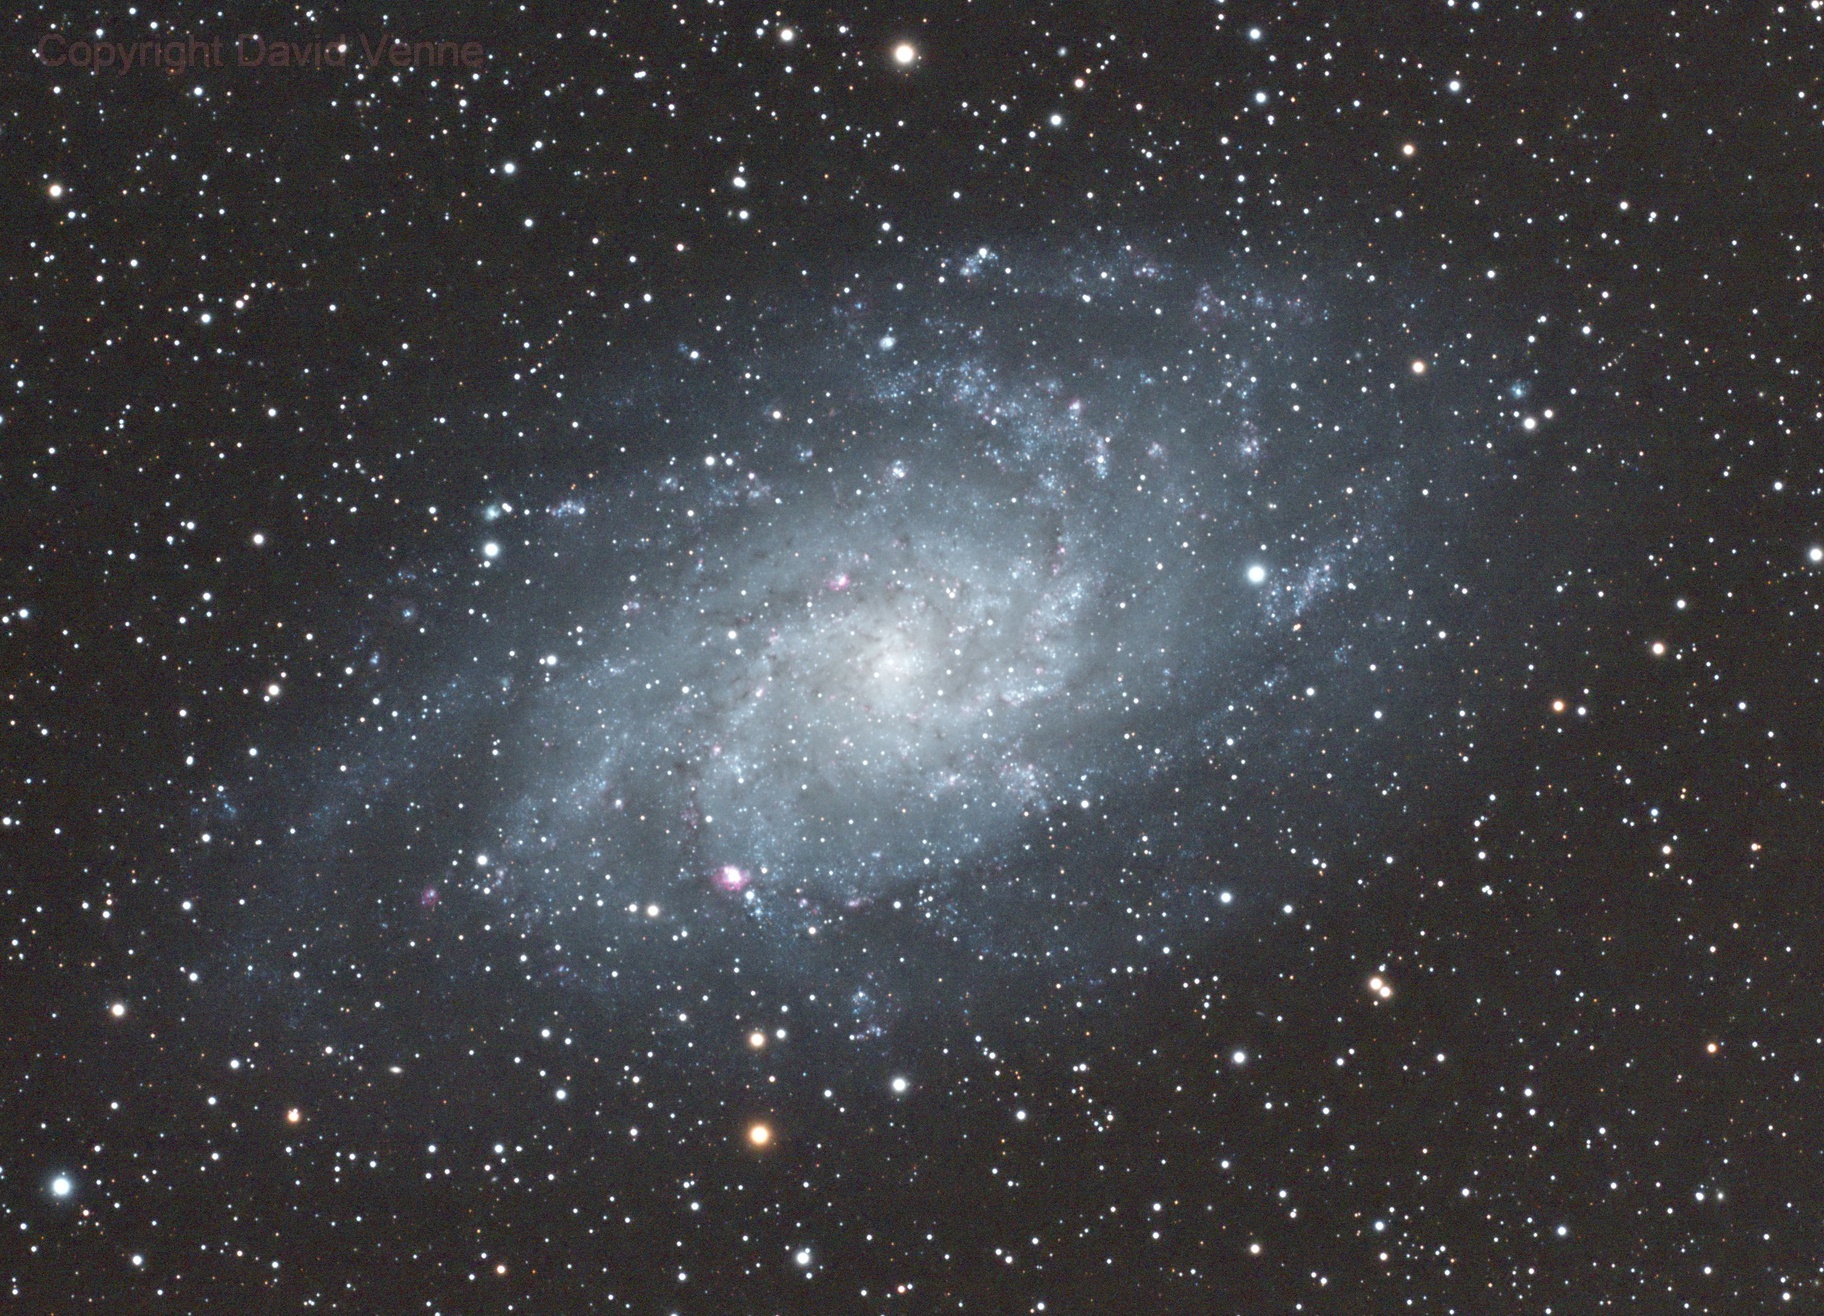
Next is one of those fortunate images a person makes while waiting for a primary target to rise. Here is M33, this time shot with the Takahashi CR 0.73 reducer.

Data and full image are here. Again note the more subtle coloration. I think the overall blue cast is "correct," but I've seen people produce M33 with colors all over the spectrum. 

Clouds ended the evening before my primary target rose high enough, so the California Nebula's RGB frames will need to wait for another night.

And No, I've not gotten back to the spectroscopic fun that I had hoped to. With winter on the doorstep it's unclear if I will.

Friday, September 16, 2022

Bumps on the imaging highway; more (unfinished) images

This is astrophotography, so things are never as easy as one hopes. 

At the beginning of September I had an all-night imaging session at the club's Eagle Lake Observatory site.  I was trying to do a few targets: M31, The California Nebula, and because a little time was left over as the dawn was approaching M42. Let's start with the latter because it illustrates the main issue.

I had only about a half an hour before the morning sky started to really brighten, so I set up NINA to do five 90-second frames for each LRGB channel. Here is the initial stretched result:

 
I did say LRGB, but this is mono! It turned out I took 20 L frames; the mystery is how that happened. I wish I could tell you, but I don't know the actual cause. My best guess is that NINA lost contact with the filter wheel and couldn't execute the filter changes. So this is not quite the image I wanted, but eventually I'll be able to shoot the chroma and make a nice image.
 
The same thing happened with my California Nebula frames and I've got 96 L frames which should make for a really nice eventual image. Here's a quick processing of the luminance frames:


This seems to have started as soon as I began imaging M31, as those are all (so far as I can tell) luminance frames. All 125 of them! I can say this from the early look at the M31 stack that if you want a very smooth background, shoot 125 frames! This is a first look at the luminance image, where I've somewhat de-emphasized field stars using PixInsight's Morphological Transformation:
 
 
Incidentally, these are all imaged using the Takahashi CR 0.73X focal reducer on my FSQ-106, so I was operating at  f/3.65 and an effective focal length of about 387mm.
 
Another mystery was easier to solve. I noticed that autofocusing was having a very difficult time. This was traced to a loosening of the connection between the motor and focuser shaft. I've tightened that up now, and just in case that was happening because of overly tight parking of the focuser I'm going to change the focuser's home position.
 
This weekend I hope to actually collect the M31 chrominance, and maybe deeper into September get the California Nebula color data.
 
-------------
 
I'm returning to something I started back in 2020: spectrographic imaging. More about that next time (I hope!)
 

Friday, July 4, 2014

Framed and Registered

The print of M31 I talked about last time has now been framed, and I've registered it for the Fine Arts competition at the State Fair.  Here's what it looks like framed:


This is a snap using an inexpensive digital camera, and I think it went blue-heavy, but you get the idea. The matte and frame are blacker than this shows. I chose anti-reflection glass, too, which lends a very slight blue tinge, much like it can do when viewed on a lens.

In a fit of optimism I decided to put a for-sale price on it. My cost, disregarding time and travel is $14 for the print and $261 for the framing, for a total of $275. The fair takes 20% of the sale price, so that becomes  $330. I set the price at $350, which means I'll have a "profit" of $20. 

Two things about that. It would be nice to have the costs taken care of, and it would be a great pleasure to know someone was willing to pay for one of my images. Seeing it hanging in the Fine Arts building with a "sold" sticker would be a blast. 

One thing at a time, though, and I won't find out what its status is until July 14-15. If it's accepted, I'll take all the mounting hardware off, and my wife will deliver it to the Judges (I'll be at the Nebraska Star Party).

This week I should really finish my Binocular mount project. The Jeffers Stargaze and NSP are going to arrive quicker than I know.


Saturday, June 14, 2014

Getting an Image Ready for the Fair

I'm a fan of our state fair, which I've attended almost every year since I was a child. In recent years I've been entering baked bread in the baking competitions with some success. My wife usually enters some of her craft work, too. And my mother, now 91 years of age, enters both stitched and baked goods.

The first day of the fair is usually dedicated to visiting the buildings where our entries are on display and seeing what ribbons we've won (most years at least one of us gets a ribbon, some years, all three). After that it's on to the Education building, the 4H building, Fine Arts Building, and then to wherever time permits. It's not unusual to attend on a couple of days, as there's a great deal to see.

One of my uncles was a painter (as I hope to be some day) and managed to get his work displayed in the Fine Arts building on a couple of occasions. He never won a prize or mention, though, which I think irritated him a little. To carry on with his tradition I'm going to submit an astrophoto this year.

In the past there's been some astronomy presence in the building. A local painter has entered her impressions of astronomical objects, and there's usually at least one picture of the Moon. Last year was a particularly fruitful year, with these on display:


At top are two star trail images, lower left is an aurora, and bottom right is art with a fairly realistic depiction of the northern sky (note the big and little dippers). Obviously my pictures don't do justice to the works!

Seeing these got me thinking that the judges might be receptive to other examples of astrophotography. So I'm submitting my M31 image from the South Dakota Star Party:


While I'm not suggesting that it's great astrophotography, it's one of my best to date, and I like it. I've had a test print made using the services of National Camera Exchange in Burnsville. It looked good and faithfully reproduced the image I submitted, but for the full-sized print (11x14 inches) I changed the yellow-blue balance a little, which nicely brought up the blue. I'm also going to print it on metallic paper, which is said to enhance the vibrancy of the color. The print will be ready next week, and then it's off to the framing shop.

The Fair requires that the image be framed with a glass or plastic cover, and I'll go with glass. Registration requires submitting an image of the art that is about 1,000 pixels on the short side. 

Judging takes place in several phases; Phase 1 is where they cull the entries based on the submitted image and is completed by July 13. Phase 2 is where the jurors do the hard work and decide what will be displayed and how awards will be allocated.

Between now and the end of registration on July 7 I need to decide if I will offer the print for sale. The price would be set by the cost of printing (a modest $14) and framing (probably not as modest) plus 20% to cover the Fair's cut and a few bucks so I can say I came out ahead on the whole thing. 

There are cash prizes awarded, and the dream would be to land one of those, sell the print, and do this over again next year with a better image. At this point reality says: Let's just see if I can get past Phase 1.

I'll post more about this as the process rolls on.


Sunday, August 11, 2013

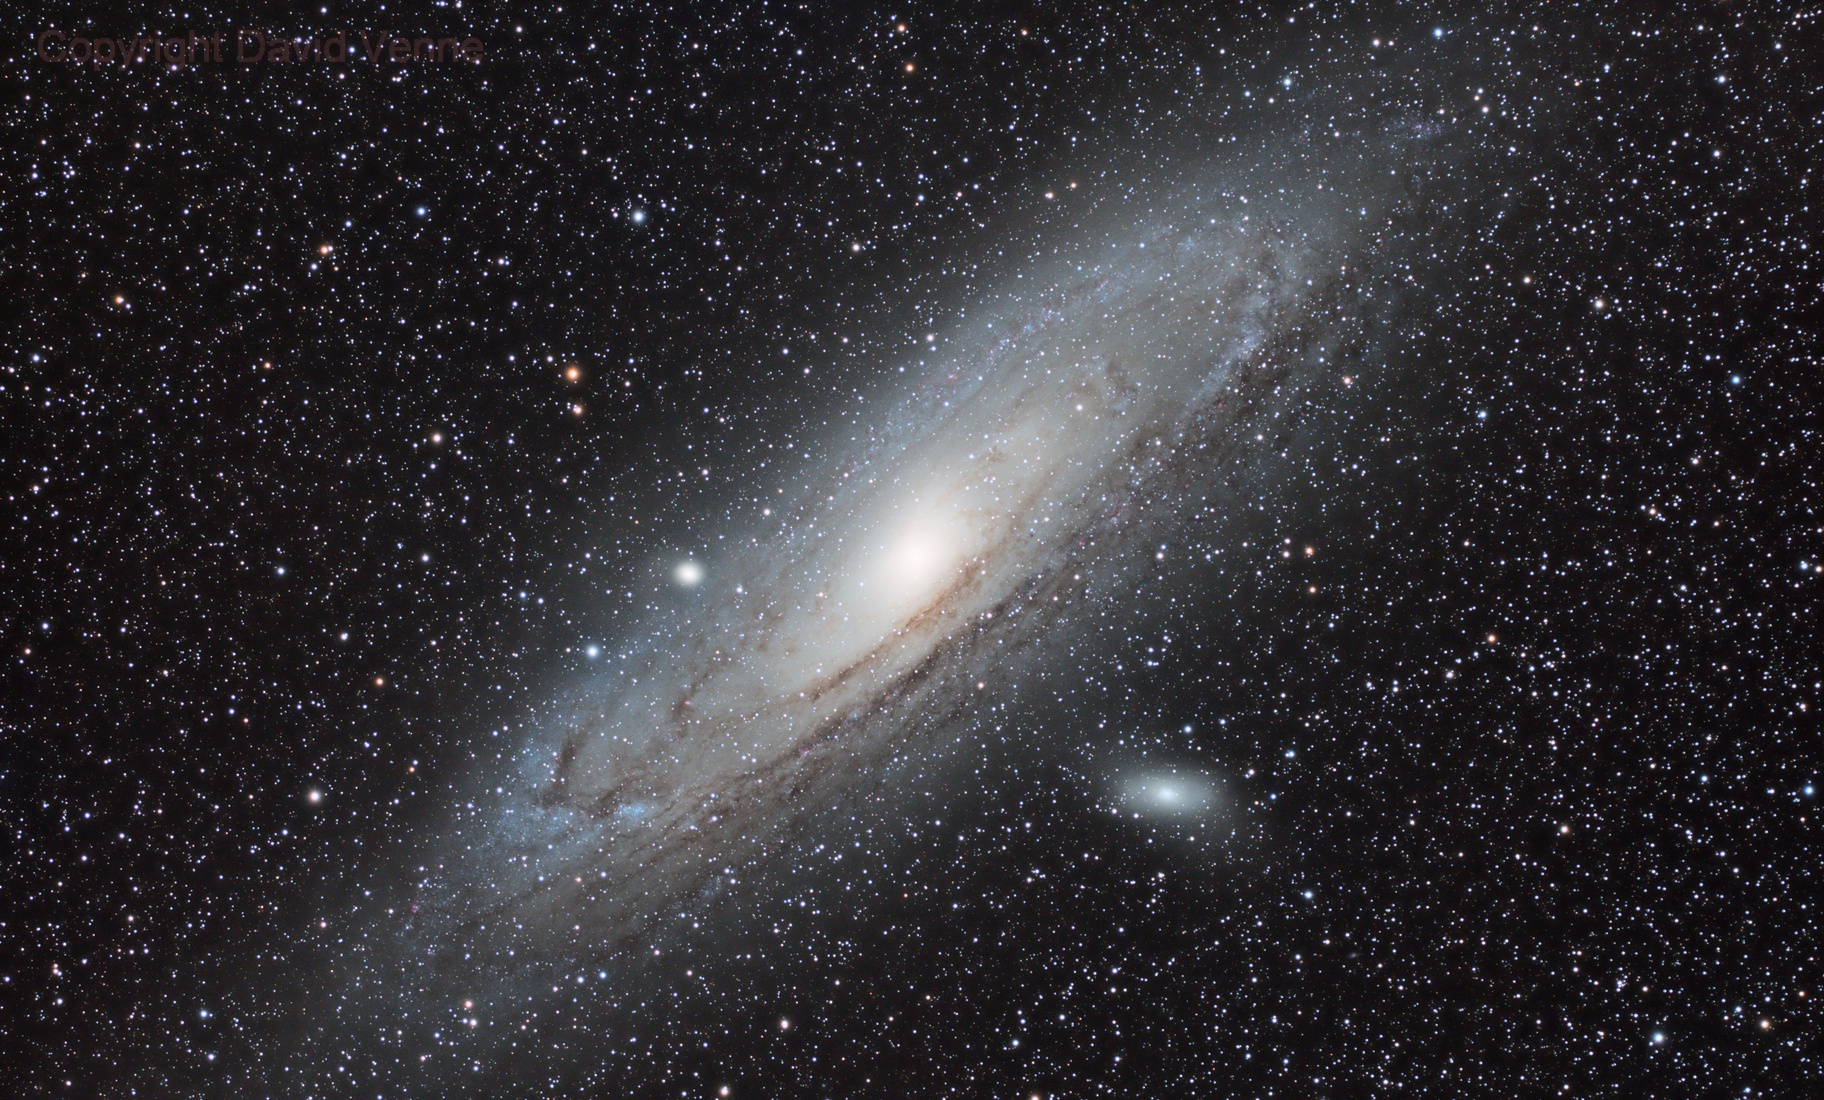
M 31 from the South Dakota Star Party

New dew controller in hand (see last entry) I was ready for the South Dakota Star Party. I had a short list of targets--The Iris Nebula, the Lagoon Nebula, the Heart Nebula. The one chosen would depend on the sky conditions. So much for plans.

Thursday night was partly cloudy with heavy dew and fog. I stayed home. Friday night started with high clouds, but went mostly clear as twilight ended. The view to the Lagoon was full of light from Sioux Falls, which was only about 15 miles away. I decided on the northern sky. I did a bore-sight polar align and tried to start with M 103. I switched over to M31 because I wanted to image something prettier. I got everything set up and running, but the first few frames were bad because the autoguider was losing the guide star in the remaining cirrus. There was a bright star at the edge of the autoguider's FOV, so I used that instead.

I set up the camera control to shoot five lights through each of the LRGB filters and then loop. That was at about 11:30. Amazingly, the system continued to run unattended for almost five hours! Focus held steady all that time, and tracking remained solid on all but one frame.

In the end I had to toss 25 frames because of clouds, one for tracking, and a couple because satellites passed right across M 31. Here's the result
Messiers 31, 32, and 110
Click for a larger version. Visit Astrobin for image details and a full-scale version.

I know the cores are overexposed, and maybe I need to do something about the blue fringing on some of the stars, and maybe I left it all a little dark. But I think I like it. Thank goodness I didn't cut the imaging short to chase after another object.

Thursday, February 23, 2012

Alternative views of M31 and M104

I created the following images while doing class prep for my astro class and thought they might be of interest. I wanted to show how M31 would look from a view above one of its poles, so I tried to compensate for the foreshortening we see because of its inclination to us. The goal was to show the central bar more clearly for those who have trouble seeing it.
m31projected2.jpg
M31: Visible light (left) and Infrared (right, Spitzer NASA/JPL/CalTech)

the left image is one of mine, and the second is a Spitzer image from NASA/JPL and CalTech. My image of M31 is not so hot; if you want to try this yourself, you would do better to start with this amazing image. I think I've got the two images reasonably aligned and scaled to match. The brightest portions of the Spitzer image coincide with the dark dust lanes in the visible-light image.

You might find this fun to do with other inclined galaxies. It won't work with very nearly edge-on galaxies. Here's the Sombrero, for example:
sombrero.jpg
M104 (Sombrero Galaxy, NASA Hubble)

Notice how the central bulge obscures the more distant portion of the dust/gas ring.

To remove foreshortening first rotate an image so that the long axis of the galaxy is either horizontal or vertical. Then resize the image, stretching it greater in the direction of its thinnest axis. (Make sure to turn off your graphics program's preservation of the aspect ratio.) Adjust the stretch amount until you have the galaxy looking round and you're done. We assume the galaxy is round, but that's not always the case. It's a decent first guess.